


Introduction
Installing and maintaining an LED video wall requires more than assembling cabinets and connecting cables. This guide explains how to plan, install, test, and maintain an LED display for stable long-term operation.
Many installation problems start before the first cabinet reaches the wall. Poor structural planning, incorrect power distribution, limited service access, or mismatched replacement modules can increase downtime and maintenance costs later.
This guide gives B2B buyers and project teams a practical framework for installation, commissioning, preventive maintenance, troubleshooting, and lifecycle planning. It also highlights the checks that should happen before final project acceptance.
What Should You Know Before Installing an LED Video Wall?
You should define the application, viewing distance, pixel pitch, brightness, refresh rate, environment, power requirements, and maintenance access before installing an LED video wall. These decisions determine both the physical installation method and the display’s long-term operating requirements.
Define the Display Application and Viewing Conditions
Start with the viewing environment rather than the LED cabinet. A retail display, conference room, control room, stadium screen, and broadcast background have different requirements.
For example, a close-view indoor display may benefit from a fine pixel pitch, while a large outdoor screen viewed from a long distance may not need the same pixel density. A higher specification does not automatically create better value when the application cannot use it.
Choose the Right Pixel Pitch, Brightness, and Refresh Rate
Pixel pitch affects image detail and recommended viewing distance. Brightness should match ambient light instead of simply reaching the highest available number.
Refresh rate also requires context. A 3,840 Hz refresh rate can suit many commercial applications, while camera-facing applications may justify 7,680 Hz depending on the camera, shutter settings, and complete display system.
Check Viewing Distance, Content Type, and Camera Requirements
Content type matters because fine text, detailed graphics, and large-format video place different demands on pixel density.
If cameras will capture the display, test the complete system rather than relying only on the refresh-rate specification. Driver IC performance, PWM behavior, receiving-card configuration, processor settings, and camera settings can all influence visible flicker or scan artifacts.
Determine Indoor or Outdoor Installation Requirements
Outdoor projects require more than weather-resistant cabinets. You should evaluate sunlight exposure, temperature variation, humidity, rain, dust, ventilation, drainage, and service access.
For indoor projects, dust accumulation, HVAC conditions, restricted airflow, and nearby heat sources can still affect component temperature and maintenance frequency.
Prepare Power, Signal, Structure, and Maintenance Access
Before ordering, create a basic installation drawing that shows cabinet arrangement, power circuits, data routes, controller location, and service access.
Factory Perspective: At the manufacturing stage, we treat cabinet dimensions and mechanical interfaces as part of system reliability. A cabinet can meet its factory specification, yet poor site alignment can create visible steps between cabinets. That is why installation tolerance deserves attention before commissioning.
How Do You Prepare the Installation Site?
A site is ready for LED video wall installation when the structure, dimensions, ventilation, power distribution, cable routing, and maintenance access meet the display manufacturer’s requirements.
Inspect the Wall, Ground, or Supporting Structure
Confirm that the mounting surface or supporting structure can handle the display system and installation hardware. Do not assume that an existing wall can support a large LED display simply because it supports other equipment.
For large installations, the structural design may require professional engineering review according to local building and electrical requirements.
Verify Dimensions, Flatness, and Load Capacity
Measure the actual installation area instead of relying only on architectural drawings. Small dimensional differences can affect cabinet positioning and final alignment.
Check the reference line before installing the first cabinet. The first cabinet establishes the reference for the cabinets that follow, so a small initial error can become a visible alignment problem across the entire display.
Plan Ventilation and Heat Dissipation
LED displays generate heat through LED packages, driver ICs, power supplies, and other electronic components. Restricted airflow can raise operating temperature and accelerate component stress.
For enclosed installations, coordinate the LED display with the room’s HVAC and ventilation design. Do not treat ventilation as an afterthought.
Reserve Front and Rear Maintenance Space
Choose the service method according to the physical site.
| Installation Factor | Front Service | Rear Service |
|---|---|---|
| Wall clearance | Minimal | Required |
| Module replacement | From front | From rear |
| Suitable applications | Fixed wall, retail | Accessible structures |
| Installation planning | Simpler in tight spaces | Requires service area |
Plan Power Distribution and Cable Routing
Calculate the electrical requirements according to the actual LED display configuration and supplier documentation. Distinguish maximum power consumption from typical operating power when estimating electrical infrastructure and operating costs.
Separate Power Cables From Signal Cables
Plan cable routes before cabinet installation. Keep power and signal routing organized and label both ends of important cables.
This approach reduces troubleshooting time because technicians can identify the affected cabinet, circuit, or signal path without dismantling unrelated equipment.
How Do You Install LED Video Wall Cabinets?
Install LED video wall cabinets from a controlled reference point, secure each cabinet according to the manufacturer’s mechanical design, and verify alignment before completing electrical and signal connections.
Install the Supporting Structure or Mounting System
Install the mounting structure according to the approved design and cabinet dimensions. Verify fixing points before loading the LED cabinets.
Position and Secure the First Cabinet
Use the first cabinet as the reference point. Check its horizontal and vertical position before continuing.
Assemble Cabinets According to the Layout
Follow the cabinet numbering and installation drawing. Maintain the planned cabinet sequence so that later receiving-card mapping matches the physical layout.
Check Cabinet Alignment and Flatness
Inspect both horizontal and vertical alignment. Uneven cabinet surfaces can produce visible seams even when individual cabinets function correctly.
Install LED Modules and Masks Correctly
Handle LED modules carefully and follow the correct orientation. Avoid unnecessary pressure on LED packages and connectors.
Inspect Cabinet Locks and Mechanical Connections
Check every mechanical connection before moving to final commissioning.
| Installation Check | What to Verify |
|---|---|
| Cabinet position | Reference line and level |
| Cabinet alignment | Horizontal and vertical tolerance |
| Cabinet flatness | No visible steps or deformation |
| Locks | Fully engaged |
| Modules | Correct orientation and seating |
| Structure | Secure mounting |
| Service access | Required clearance maintained |
Factory Perspective: Cabinet-to-cabinet alignment depends on both cabinet machining and installation technique. When we inspect finished displays, we look beyond whether a cabinet powers on. We also consider mechanical consistency because optical uniformity starts with physical alignment.

How Should You Connect Power and Signal Cables?
Power and signal connections should follow the cabinet wiring diagram, circuit capacity, receiving-card configuration, grounding requirements, and cable labeling plan.
Connect the LED Video Wall Power System
Follow the manufacturer’s electrical documentation and local electrical requirements. Confirm voltage, circuit capacity, connectors, and protection before energizing the system.
Configure Power Distribution by Cabinet or Circuit
Distribute the load according to the approved electrical design. Avoid treating every installation as if cabinet quantity alone determines circuit requirements.
Connect Receiving Cards and Data Cables
Connect data cables according to the designed signal path and verify IN/OUT direction where applicable.
Connect the LED Controller and Video Source
Connect the video processor or controller to the intended source and verify the input resolution and signal format.
Verify Grounding and Electrical Safety
Grounding and electrical protection should follow applicable local requirements and the manufacturer’s instructions. Qualified electrical personnel should handle project-level electrical work.
Label Cables for Future Maintenance
Cable labels become particularly valuable when a large display contains dozens or hundreds of cabinets.
| Connection | Main Check |
|---|---|
| AC Power | Voltage and circuit capacity |
| Cabinet Power | Correct input/output sequence |
| Data Cable | Correct signal direction |
| Receiving Card | Correct cabinet mapping |
| Controller | Correct signal source |
| Grounding | Electrical safety |
| Cable Labeling | Cabinet and circuit identification |
Factory Perspective: Intermittent faults often require technicians to inspect the complete signal and power path. Clear labeling and documented wiring reduce diagnostic time and prevent unnecessary module replacement.

How Do You Configure and Test an LED Video Wall?
Commissioning should verify cabinet mapping, input resolution, signal stability, brightness, grayscale, refresh rate, color uniformity, dead pixels, temperature, and power stability before final acceptance.
Configure the Receiving Cards
Load the correct configuration and confirm that each receiving card controls the intended cabinet or cabinet group.
Map the Cabinet Layout in the Control System
The physical cabinet arrangement should match the software mapping. Incorrect mapping can cause image displacement or unexpected cabinet behavior.
Set Resolution and Input Signal Parameters
Confirm the source resolution and processor configuration before testing content.
Configure Brightness, Grayscale, and Refresh Rate
Set the display according to the application rather than simply selecting the maximum available setting.
Test Every Cabinet and Module
Run test patterns that can reveal dead pixels, abnormal colors, missing scan areas, and signal interruptions.
Check Color Uniformity and Seam Alignment
Look at the display from normal viewing positions. A technically functioning display can still show visible differences in brightness or color.
Perform Camera and Content Testing When Required
For broadcast, virtual production, event recording, or other camera-facing applications, test the actual camera and content combination.
Factory Perspective: A power-on test proves only that the system starts. It does not prove that calibration, cabinet mapping, image uniformity, or camera performance meets the project’s requirements.
How Do You Maintain an LED Video Wall After Installation?
LED video wall maintenance should combine visual inspection, cleaning, electrical checks, thermal monitoring, software management, pixel inspection, and periodic calibration.
Follow a Preventive Maintenance Schedule
Preventive maintenance helps identify developing faults before they create extended downtime. Record inspection results so technicians can compare changes over time.
Clean LED Modules and Cabinet Surfaces
Use cleaning methods recommended by the display manufacturer. Avoid applying excessive pressure directly to LED packages or using unsuitable liquids.
Inspect Power Supplies, Cables, and Connectors
Look for abnormal heat, loose connections, damaged cables, or signs of electrical stress.
Check Receiving Cards and Control Equipment
Monitor communication stability and confirm that control equipment operates within the intended configuration.
Monitor Temperature and Ventilation
Temperature changes can reveal blocked airflow, overloaded equipment, or cooling problems.
Check Brightness and Color Uniformity
Compare the display against previous inspection records. A gradual change can be more useful diagnostically than a single visual inspection.
Update Control Software and Firmware Carefully
Do not update critical system components without checking compatibility and preserving the existing configuration.
| Maintenance Item | Recommended Action |
|---|---|
| LED surface | Remove dust and contamination |
| Power supply | Check temperature and stability |
| Data cables | Inspect connections |
| Receiving cards | Check communication |
| Cooling system | Verify airflow |
| Display uniformity | Inspect brightness and color |
| Software | Check compatibility and updates |
| Structure | Inspect mechanical connections |
Factory Perspective: Maintenance records become particularly useful when a display operates for years. A technician who knows which modules, power supplies, or cabinets changed previously can diagnose new problems much faster.
What Is the Difference Between Indoor and Outdoor LED Video Wall Maintenance?
Outdoor LED video walls require additional inspection of waterproofing, drainage, corrosion, temperature, sunlight exposure, and ventilation compared with indoor displays.
Indoor LED Video Wall Maintenance
Indoor displays usually face more controlled temperature and moisture conditions, but dust and restricted airflow can still create problems.
Outdoor LED Video Wall Maintenance
Outdoor displays must account for rain, humidity, sunlight, temperature changes, dust, wind exposure, and drainage.
Control Dust, Humidity, Rain, and Temperature
Inspect the enclosure and ventilation path regularly. Environmental protection works as a system, not as a single IP rating.
Inspect Waterproofing and Drainage
Check seals, cabinet interfaces, cable entry points, and drainage paths. Water that enters or remains trapped in the structure can create problems even when the cabinet design includes weather protection.
Manage Heat and Direct Sunlight
Direct sunlight increases the thermal load on the display surface and surrounding structure. Outdoor designs should account for actual installation exposure.
| Factor | Indoor | Outdoor |
|---|---|---|
| Dust | Moderate | High |
| Moisture | Controlled | Rain/humidity exposure |
| Temperature | Relatively stable | Wide variation |
| Waterproofing | Limited | Critical |
| Drainage | Usually unnecessary | Required |
| Sunlight | Limited | Direct exposure |
| Corrosion | Lower risk | Higher risk |
Factory Perspective: Outdoor reliability does not depend on one specification. Cabinet sealing, coating, connectors, drainage, ventilation, component selection, and installation quality work together.
How Often Should an LED Video Wall Be Maintained?
An LED video wall should follow a preventive maintenance schedule based on operating hours, environmental exposure, brightness requirements, and system complexity. A practical program combines frequent visual checks with monthly technical inspections and deeper quarterly or annual service.
Daily and Weekly Visual Checks
Start with simple observations. Operators should check whether the entire screen displays normally and whether any cabinet, module, or section shows abnormal brightness, color, flicker, or signal behavior.
For continuously operating commercial displays, teams should also watch for unusual fan noise, excessive heat, unexpected shutdowns, or visible damage. Early detection matters because a small module fault can become a larger service issue when technicians ignore its warning signs.
Monthly Technical Inspection
A monthly inspection should move beyond the image itself. Technicians can inspect power supplies, data connections, receiving cards, cooling paths, cabinet connections, and operating temperatures.
The exact interval should follow the manufacturer’s maintenance guidance and the site’s operating conditions. A screen installed in a clean, temperature-controlled room does not face the same maintenance burden as a high-brightness outdoor display.
Quarterly Preventive Maintenance
Quarterly service provides an opportunity to clean accessible components, inspect electrical connections, check mechanical structures, and review system logs.
Technicians should also compare current display performance with previous records. A gradual change in brightness, temperature, or color uniformity can reveal developing problems before the display experiences a complete failure.
Annual System Inspection and Calibration
An annual inspection should provide a broader review of the complete system. The team can check cabinet structure, power distribution, signal equipment, cooling performance, display uniformity, and calibration.
For displays that require precise image consistency, the team should also review whether aging modules have created visible differences. Calibration becomes more important when individual modules have been replaced at different times.
Adjust the Schedule for Outdoor and High-Usage Displays
Operating conditions should determine the maintenance schedule. Outdoor screens face rain, dust, humidity, sunlight, temperature changes, and potentially corrosive environments.
High-brightness displays also place greater demands on thermal management. Therefore, a fixed annual maintenance schedule should not replace condition-based inspection.
How Do You Replace LED Modules and Other Components?
Replace an LED module only after identifying the failed component, matching the replacement with the existing electrical and optical specifications, and checking configuration and calibration after installation.
Identify the Failed Component Before Replacement
Do not replace a module simply because one area of the screen looks abnormal. A black section may result from power loss, a data connection problem, a receiving-card fault, or a module failure.
Technicians should isolate the fault first. This approach prevents unnecessary component replacement and helps preserve the original system configuration.
Replace LED Modules Without Damaging Neighboring Components
Follow the manufacturer’s service procedure when removing a module. Handle the module carefully and avoid damaging connectors, LED packages, masks, or neighboring modules.
Front-service and rear-service designs also require different maintenance procedures. The correct service method depends on the cabinet design, not on a technician’s preferred working method.
Match Replacement Modules With Existing Specifications
A replacement module should match the relevant specifications of the existing display, including pixel pitch, dimensions, electrical interface, scan configuration, and optical characteristics.
Physical compatibility alone does not guarantee visual consistency.
Reconfigure and Calibrate After Module Replacement
A replacement module may require configuration or calibration after installation. Technicians should check brightness and color consistency against adjacent modules.
This step matters particularly for displays that have operated for an extended period.
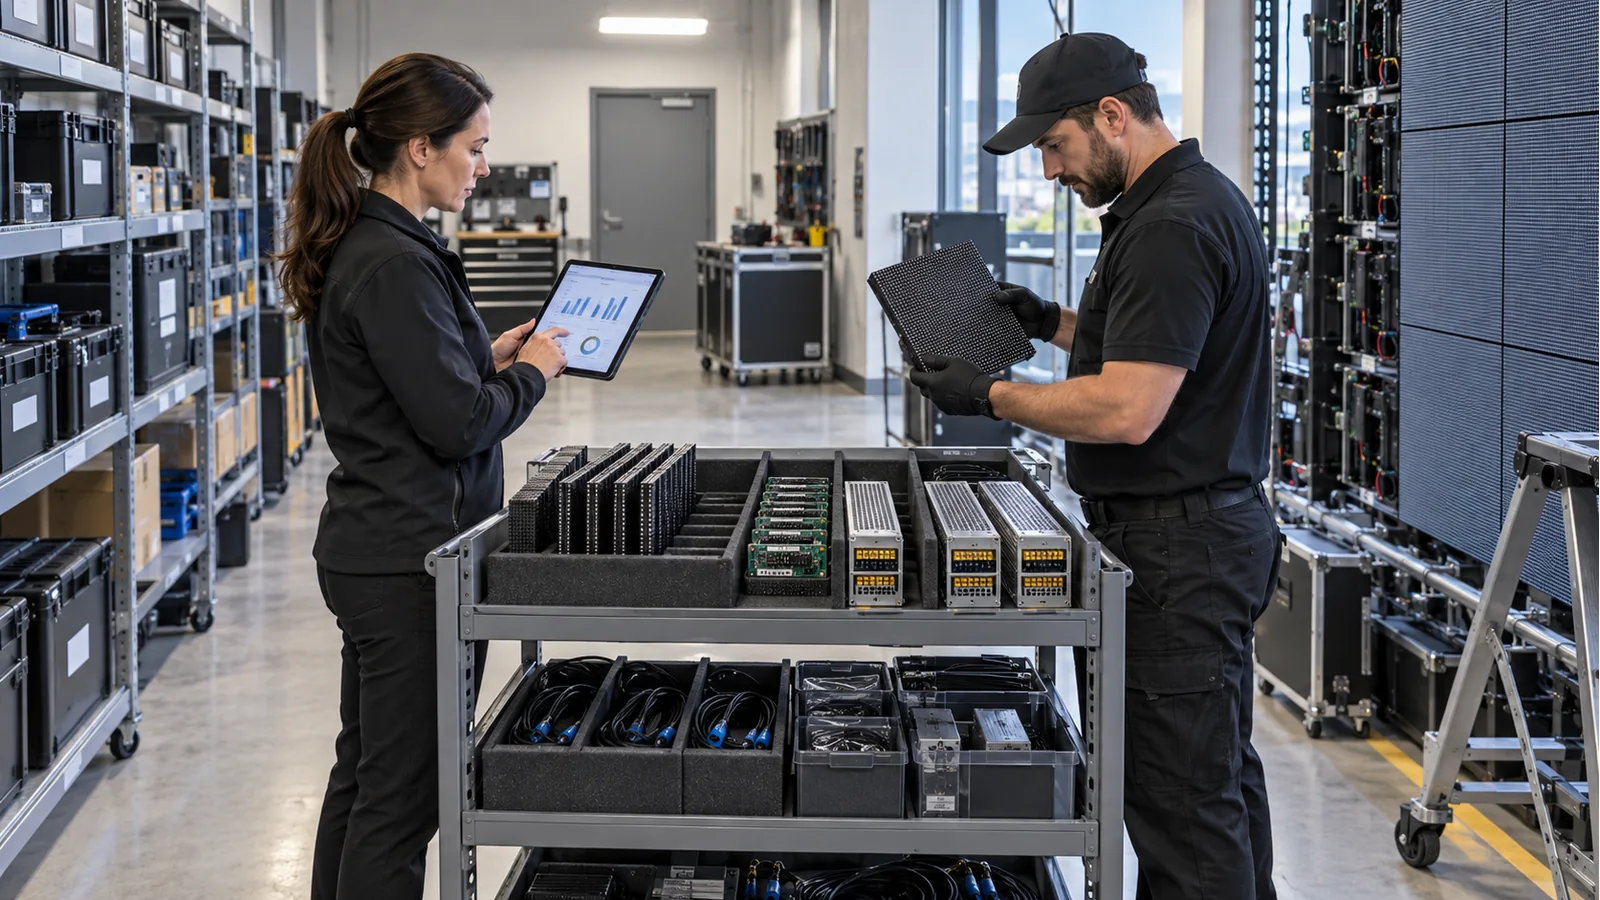
Keep Spare Modules and Critical Components On Site
B2B operators should establish a spare-parts plan before a failure occurs. The required inventory depends on screen size, operating hours, application criticality, supplier lead time, and component availability.
Useful spare parts may include:
- LED modules
- Power supplies
- Receiving cards
- Data cables
- Power cables
- Cabinet-specific connectors
- Other project-specific electronic components
Factory Perspective: From a manufacturing perspective, “compatible” does not always mean “visually identical.” LED modules can differ in optical characteristics even when they share the same pixel pitch and physical dimensions. For long-term consistency, buyers should confirm replacement-module compatibility with the original production configuration before purchasing spare parts from another source.
How Can You Reduce LED Video Wall Maintenance Costs?
The most effective way to reduce LED video wall maintenance costs is to plan service access, spare parts, preventive inspection, component compatibility, and downtime control during the initial project design.
Choose Front-Service or Rear-Service Cabinets Based on Site Conditions
Front-service cabinets can simplify maintenance when the display sits directly against a wall. Rear-service designs can work well when technicians have reliable access behind the display.
The cheapest cabinet is not necessarily the cheapest system to maintain. A cabinet that requires extensive dismantling for a simple module replacement can increase labor time throughout the display’s operating life.
Build Maintenance Access Into the Initial Design
Maintenance access should appear on the installation drawing before construction begins. The project team should determine how technicians will reach modules, power supplies, receiving cards, and other serviceable components.
This decision becomes difficult to change after the structure and surrounding architecture are complete.
Keep Critical Spare Parts Available
Spare parts can reduce downtime when a failure occurs. However, buyers should avoid purchasing an arbitrary quantity of components.
Instead, evaluate:
- Display size
- Number of cabinets
- Operating hours
- Environmental exposure
- Project criticality
- Expected supplier lead time
- Component lifecycle
Use Preventive Maintenance Instead of Reactive Repair
Reactive repair waits until a component fails. Preventive maintenance looks for warning signs before failure.
For a commercial installation where downtime affects advertising, events, retail operations, or corporate communications, the cost of lost operating time can exceed the cost of a scheduled inspection.
Evaluate Total Cost of Ownership, Not Only Purchase Price
A B2B buyer should compare the complete ownership model rather than comparing cabinet prices alone.
| Cost Factor | Lower Maintenance Requirement | Higher Maintenance Requirement |
|---|---|---|
| Service Access | Appropriate front/rear access | Difficult access |
| Spare Parts | Planned inventory | Emergency sourcing |
| Downtime | Preventive repair | Reactive repair |
| Cleaning | Accessible surfaces | Difficult access |
| Component Replacement | Modular service | Complex service |
| Calibration | Planned | Reactive |
The total cost also depends on installation labor, energy use, replacement components, service contracts, and expected downtime. A supplier quotation should therefore show what the display system includes and what future maintenance will require.
Factory Perspective: A manufacturer can influence maintenance cost before production starts through cabinet design, module accessibility, component standardization, and spare-parts planning. B2B buyers should ask suppliers to explain not only the purchase price but also how a technician will replace a failed component five years after installation.
When Should You Work With an LED Display Manufacturer?
Professional manufacturer support becomes especially valuable when a project involves custom cabinet dimensions, complex installation conditions, outdoor exposure, camera requirements, or long-term spare-parts planning.
Complex Large-Format or Custom LED Video Wall Projects
Large displays require coordinated planning across cabinets, structure, power, signal distribution, and control systems.
Custom cabinet dimensions can also change the mechanical and electrical design, so early technical coordination can prevent installation conflicts.
Outdoor and High-Brightness Applications
Outdoor installations require more detailed consideration of environmental conditions, thermal management, waterproofing, drainage, and structural design.
A manufacturer can help match the display configuration with the actual site conditions instead of treating every outdoor project as the same application.
Projects Requiring Custom Cabinet Dimensions
Custom cabinets can help accommodate unusual wall dimensions, curved layouts, corners, or specific architectural requirements.
However, customization should follow a clear technical drawing. A custom cabinet should solve a measured site problem, not simply add complexity to the product.
Broadcast, Virtual Production, and Camera-Facing Applications
Camera-facing applications require more than a high refresh-rate number on a datasheet. The complete display system should be tested with the intended camera, processor, content, and operating settings.
This approach can identify flicker or scan-related problems before the display reaches the production environment.
Projects Requiring Long-Term Spare Parts and Technical Support
Long-term projects should establish a support plan before shipment. Buyers should confirm documentation, spare-part availability, configuration files, troubleshooting procedures, and technical support channels.
Factory Perspective: A manufacturer’s value should not end when the cabinets leave the factory. For B2B projects, the more useful question is whether the supplier can support the display through installation, commissioning, component replacement, calibration, and long-term maintenance.
Three Actions B2B Buyers Can Take Next Week
1. Review Your Installation Site
Measure the available wall or structure, viewing distance, service clearance, ambient conditions, and available power. Record these details before requesting quotations.
2. Create an Installation Acceptance Checklist
Ask suppliers to confirm cabinet alignment, image uniformity, signal stability, power performance, calibration, temperature, and system configuration before final acceptance.
3. Confirm Your Maintenance and Spare Parts Plan
Ask how technicians will replace modules, power supplies, and receiving cards. Confirm spare-part compatibility and technical support before placing the purchase order.
LED Video Wall Installation and Maintenance FAQs
What should be checked before installing an LED video wall?
Confirm structural capacity, dimensions, cabinet layout, power distribution, signal routes, ventilation, environmental exposure and front or rear maintenance access before installation.
How often should an LED video wall be maintained?
Use frequent visual checks, monthly technical inspections, quarterly preventive service and an annual system review, then adjust the interval for operating hours and environmental exposure.
Which LED video wall spare parts should be kept on site?
A practical stock can include matched LED modules, power supplies, receiving cards, data and power cables, and cabinet-specific connectors based on screen size, criticality and supplier lead time.
Conclusion
A successful LED video wall project starts long before cabinet installation and continues throughout the display’s operating life. Correct site assessment, cabinet alignment, power and signal planning, commissioning, and preventive maintenance work together to protect image quality and system stability. Buyers should therefore evaluate installation and maintenance requirements as part of the initial purchasing decision rather than as separate after-sales issues.
Before placing an order, review your installation site, confirm the required pixel pitch and display specifications, and prepare a clear acceptance checklist covering cabinet alignment, image uniformity, signal stability, power, temperature, and calibration. Then ask your supplier how they handle module replacement, spare parts, configuration backup, and long-term technical support. These steps can expose hidden maintenance risks before they become expensive problems.
NSELED can provide more than an LED display quotation. We can help B2B customers connect display configuration, cabinet design, installation requirements, maintenance access, spare-parts planning, and customized project conditions into one practical solution. If you are planning an LED video wall project, contact NSELED to discuss your project requirements and receive a customized technical solution.