


Introduction
An LED Learning Center helps buyers understand LED display technology, specifications, applications, and purchasing decisions before they commit to a project.
Many B2B buyers receive several quotations that appear almost identical. Yet the suppliers may use different LED packages, driver ICs, power supplies, cabinet structures, calibration processes, and testing procedures. A lower price can therefore hide a different technical configuration.
This guide gives buyers a practical framework for comparing LED displays, specifications, manufacturers, costs, installation requirements, and lifecycle risks. It focuses on the details that matter when a quotation becomes a real project.
What Is an LED Display and How Does LED Display Technology Work?
An LED display is a modular direct-view display system that uses light-emitting diodes to create images, video, text, and graphics. A complete system combines LED modules, PCBs, driver ICs, power supplies, receiving cards, cabinets, and a control system.
The basic signal path is straightforward: the video source sends data to the control system, the receiving cards distribute that data, driver ICs regulate individual LED channels, and the LED pixels produce the final image.
However, the visible screen represents only the final layer of a much larger system. The electrical and mechanical configuration behind each pixel strongly influences brightness consistency, heat generation, serviceability, and long-term stability.
What Is an LED Display?
An LED display consists of many smaller display modules assembled into a larger screen. Each module contains an array of LED pixels and electronic components that control those pixels.
This modular structure gives LED technology an important advantage for commercial projects. Manufacturers can configure screen dimensions, pixel pitch, cabinet size, brightness, protection level, and maintenance method according to the installation.
For buyers, that flexibility also creates a challenge. Two screens with the same pixel pitch are not necessarily equivalent products.
How an LED Display Produces Images
A simplified LED display signal chain looks like this:
The red, green, and blue LED elements within each pixel combine different light intensities to reproduce colors and grayscale levels.
The driver IC controls the electrical behavior of those LED channels. This component therefore deserves more attention than its position on a quotation might suggest.
At high refresh rates, driver performance, PCB layout, current control, and thermal behavior interact. A factory does not evaluate a driver IC only by whether the screen can reach a stated refresh-rate number. Engineers also consider how the selected configuration behaves during continuous operation.

Key Components of an LED Display System
| Component | Primary Function | What Buyers Should Check |
|---|---|---|
| LED package | Produces light | Consistency, brightness, color |
| LED module | Basic display unit | Pixel layout, serviceability |
| PCB | Connects components | Layout and thermal design |
| Driver IC | Controls LED channels | Refresh rate, current control |
| Power supply | Provides electrical power | Capacity and stability |
| Receiving card | Processes display data | Compatibility and signal control |
| Cabinet | Supports modules | Flatness, protection, service |
| Control system | Manages content | Resolution and compatibility |

A quotation that lists only “P2.5, 500 × 500 mm cabinet, 3840Hz” does not provide enough information for a serious technical comparison.
How Component Quality Affects Real-World Display Performance
The specification sheet describes what a display can achieve; the component configuration determines how consistently it achieves it.
For example, two P2.5 displays can have different power supplies, driver ICs, LED packages, PCB layouts, and calibration procedures. They may therefore behave differently under continuous operation even though their headline specifications look similar.
This distinction matters particularly for large B2B projects. A small difference between modules becomes much more visible when hundreds of cabinets form one continuous image.
From a manufacturing perspective, we pay attention to consistency across the production batch rather than checking only one finished cabinet. Incoming component inspection, module testing, aging, calibration, and final system testing all help reduce variation before shipment.
For buyers, the practical lesson is simple: ask the manufacturer what components and testing conditions sit behind every major specification.
The IEC’s current IEC 62368-1:2023 addresses safety requirements for audio, video, information and communication technology equipment, while IEC 62031:2026 addresses safety requirements for LED modules. These standards illustrate why product safety and display performance should remain separate questions during supplier evaluation.
A Practical Factory-Level Check Before You Request a Quote
Before asking suppliers for prices, prepare these basic project inputs:
- Screen width and height
- Indoor or outdoor environment
- Minimum and typical viewing distance
- Main content type
- Fixed or rental installation
- Front or rear maintenance requirement
- Camera or broadcast requirement
- Expected operating hours
Do not start with “What is your cheapest P2.5 LED display?” Start with the project conditions. The supplier can then recommend a configuration that solves the actual visual and installation requirements.
Factory Perspective: Product category and component architecture should be defined before price comparison. Cabinet construction, module design, protection level, driver configuration, and service method can all change the real project cost without changing the basic pixel-pitch label.
Quick Buyer Takeaway
An LED display is not simply a collection of LED lamps. It is an integrated optical, electronic, mechanical, thermal, and control system.
That distinction becomes increasingly important as the screen gets larger, the viewing distance gets shorter, or the project requires continuous operation.
LED Display Types: Which Technology Fits Your Application?
The right LED display type depends on installation environment, viewing distance, screen size, brightness requirements, service method, and application—not simply on the newest available technology.
| LED Display Type | Environment | Main Characteristic | Typical Applications |
|---|---|---|---|
| Indoor LED | Indoor | Controlled brightness | Retail, conference |
| Outdoor LED | Outdoor | High brightness, weather protection | DOOH, signage |
| Fine-Pitch LED | Short viewing distance | High pixel density | Control rooms, studios |
| Rental LED | Temporary | Fast assembly | Events, concerts |
| Transparent LED | Glass façades/windows | High transparency | Retail, architecture |
| Flexible LED | Curved structures | Flexible form factor | Creative installations |
| Floor LED | Interactive flooring | Load-bearing structure | Events, museums |
Indoor vs. Outdoor LED Displays
Indoor LED displays generally focus on comfortable brightness, close viewing distances, fine pixel pitch, and integration with the surrounding architecture.
Outdoor displays face a different engineering problem. They need sufficient brightness for ambient daylight and appropriate protection against environmental exposure.
An outdoor LED display should not be selected simply because its brightness number is higher. Excessive brightness can create unnecessary power demand and may not improve the viewing experience.
The cabinet, module sealing, connectors, drainage design, power system, and installation structure also affect outdoor performance.
Fixed Installation vs. Rental LED Displays
Fixed LED displays normally prioritize long-term structural integration and service access. Rental LED displays prioritize rapid assembly, transportation, lightweight cabinets, and repeated installation cycles.
A rental cabinet can therefore become an inefficient choice for a permanent installation if its mechanical design does not match the building structure.
Conversely, a heavy fixed cabinet may create unnecessary transportation and labor costs for a touring event.
Fine-Pitch, COB, SMD and Other LED Technologies
Fine-pitch LED displays target shorter viewing distances where pixel density becomes more visible. SMD remains widely used across commercial applications, while COB provides a different packaging structure that can benefit certain fine-pitch and surface-protection requirements.
Buyers should select packaging technology after defining the application, not before.
The factory also evaluates repair procedures. A technology that looks excellent during a showroom demonstration may require a different maintenance process once individual modules need replacement.
Transparent, Flexible and Creative LED Displays
Transparent LED displays can preserve visibility through glass façades or windows. Flexible LED products can support curved or creative structures.
However, creative LED projects often require more engineering than standard flat screens. Designers need to consider mounting geometry, module dimensions, cable routing, heat dissipation, and maintenance access.
A visually impressive concept still needs a serviceable engineering design.

How to Match LED Display Type to Project Requirements
Use this sequence when narrowing down the product category:
- Define the environment.
- Measure the minimum and typical viewing distance.
- Determine required brightness.
- Identify fixed or temporary installation.
- Define service access.
- Check structural and thermal restrictions.
- Consider camera or content requirements.
- Then compare pixel pitch and packaging technology.
This sequence prevents buyers from comparing products that solve completely different problems.
Factory Perspective: We recommend determining the product category before comparing quotations because cabinet construction, module design, protection level, service method, and component selection can significantly change actual system cost.
LED Pixel Pitch Explained: How to Choose the Right Pixel Pitch
LED pixel pitch should primarily match viewing distance, content detail, screen size, camera requirements, and budget. A smaller pixel pitch is not automatically a better choice.
| Pixel Pitch | Typical Application | Main Buying Consideration |
|---|---|---|
| P0.7–P1.2 | Premium indoor, control rooms, broadcast | Very short viewing distance and high image detail |
| P1.5–P1.8 | Corporate, retail, premium indoor | High image density |
| P2.5 | Retail, meeting rooms, commercial spaces | Balance between clarity and cost |
| P3.9 | Events, rental, medium-distance viewing | Cost-effective for temporary applications |
| P4–P6 | Outdoor advertising, large-format displays | Longer viewing distance |
| P8+ | Large outdoor screens | Long-distance visibility |
What Does LED Pixel Pitch Mean?
Pixel pitch is the center-to-center distance between two adjacent LED pixels, normally measured in millimeters. A smaller number means more pixels can fit into the same physical area.
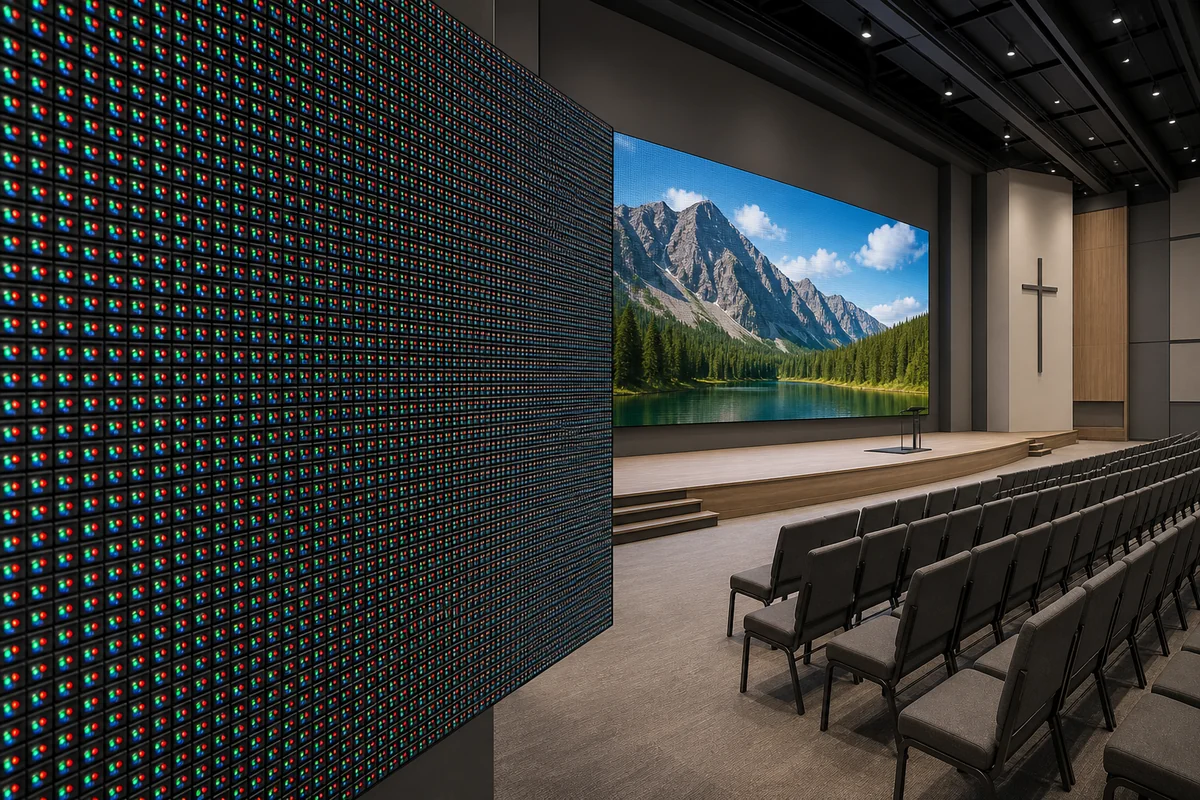
For example, a P2.5 display places pixels 2.5 mm apart, while a P1.2 display places them 1.2 mm apart.
The difference becomes important when viewers stand close to the screen. At short distances, smaller pixels can produce smoother images and reduce the visibility of individual pixel structures.
However, pixel pitch does not work independently. Screen size and viewing distance must be considered together.
Pixel Pitch and Viewing Distance
A useful starting point is to estimate the minimum viewing distance and then validate the result with the actual content and screen dimensions.
A simple rule of thumb is:
Approximate comfortable viewing distance ≈ pixel pitch × 1,000
This is not a universal engineering formula. Human vision, content type, screen size, viewing angle, and installation environment can change the practical result.
For B2B projects, therefore, avoid specifying pixel pitch from a generic chart alone. A conference display viewed from 3 meters and a retail video wall viewed from 8 meters may need very different configurations even when both are classified as “indoor.”
Common Pixel Pitches and Their Applications
P0.7–P1.2 generally targets premium close-viewing environments where image detail matters. Typical applications include high-end control rooms, executive visualization spaces, and certain broadcast environments.
P1.5–P1.8 provides a strong balance for premium corporate, retail, and commercial interiors.
P2.5 remains a practical choice for many meeting rooms, retail environments, and commercial displays where viewers are not standing immediately next to the screen.
P3.9 is common in rental and event applications because viewers normally watch the screen from several meters away.
P4–P6 and larger pitches become increasingly suitable for outdoor advertising and large-format screens where viewing distances are greater.
Why Smaller Pixel Pitch Does Not Always Mean a Better LED Display
Do not pay for a smaller pixel pitch when viewers cannot benefit from the additional pixel density.
Suppose an outdoor advertising screen is mounted on a building and most viewers remain tens of meters away. Moving from P6 to P2.5 may substantially increase LED quantity and system cost without producing a proportionate improvement for the audience.
Smaller pitch also increases manufacturing complexity. The same square meter contains more LED pixels, which means higher component density and greater calibration workload.
This is one area where a factory perspective changes the purchasing conversation.
When pitch decreases, manufacturers must manage more LED packages, tighter PCB layouts, more driver channels, and stricter module consistency. The buyer therefore pays not only for “more pixels” but also for the additional manufacturing and quality-control requirements.
Pixel Pitch vs. Resolution vs. Total Project Cost
Pixel pitch describes pixel density, while resolution describes the total number of pixels on a specific screen.
A large P4 screen can contain more total pixels than a small P1.5 screen because physical screen dimensions differ.
For procurement, compare these three variables separately:
- Pixel pitch: distance between pixels
- Screen dimensions: physical width and height
- Resolution: total horizontal × vertical pixel count
Then consider whether the content source can actually use the available resolution.
Factory Perspective: Reducing pixel pitch increases LED quantity per square meter, PCB density, driver-channel requirements, calibration workload, and component cost. The smallest pitch can therefore increase project cost without improving viewer experience at long viewing distances.
SMD vs. COB LED Displays: What Is the Difference?
SMD and COB are different LED packaging technologies. SMD uses individually packaged LED components mounted on a PCB, while COB integrates LED chips directly onto a substrate and uses a protective packaging structure. COB can offer advantages in surface protection and fine-pitch applications, while SMD remains a broadly used and mature solution.
SMD vs. COB Comparison at a Glance
| Factor | SMD LED Display | COB LED Display |
|---|---|---|
| LED Packaging | Individual package | Chip directly integrated |
| Surface Protection | Standard | Higher |
| Fine Pixel Pitch | Widely available | Strong suitability |
| Maintenance | Established process | Different repair process |
| Application | Broad commercial use | Fine-pitch, premium applications |
| Cost | Generally lower | Generally higher |
How SMD and COB Packaging Work
SMD stands for Surface-Mount Device. Individual red, green, and blue LED packages are mounted onto a PCB to form the display pixels.
COB, or Chip-on-Board, places LED chips directly onto the substrate before the packaging and protection process.

The difference occurs before the finished cabinet reaches the installation site. It affects manufacturing yield, surface structure, repair procedures, calibration, and ultimately the cost of maintaining the display.
For buyers, SMD and COB should therefore be evaluated as complete lifecycle solutions rather than simply as two visual technologies.
Pixel Protection and Surface Durability
COB’s integrated packaging structure can provide a more robust display surface than conventional exposed SMD packages. This can be particularly useful in environments where accidental contact, dust, or frequent physical interaction creates additional risk.
That does not mean every COB display is automatically suitable for every harsh environment. Cabinet sealing, module construction, installation conditions, and thermal design still matter.
For an interactive museum, control room, or premium indoor installation, the value of COB may come from a combination of surface protection and fine-pitch capability rather than from one specification.
Calibration and Color Uniformity
Both SMD and COB displays require careful calibration.
LED packages or chips can vary in brightness and color characteristics. Manufacturers therefore use production controls and calibration processes to reduce visible differences between pixels and modules.
The important procurement question is not simply “Is it COB?” but rather:
“How does the factory control LED consistency and calibration across the complete production batch?”
This becomes particularly important for large screens. A slight color difference between two modules may be difficult to notice individually but obvious when those modules sit next to each other on a video wall.
Maintenance and Module Replacement
SMD has a mature repair ecosystem and well-established module replacement procedures.
COB requires different repair methods because the LED chips form part of the integrated package structure. The maintenance process can therefore differ from conventional SMD repair.
Before purchasing a COB display, ask the manufacturer about:
- Module replacement procedures
- Spare-module availability
- Repair capability
- Calibration-data retention
- Replacement-module compatibility
- Expected maintenance time
When Should Buyers Consider COB?
Consider COB when the project prioritizes fine pixel pitch, surface protection, premium close-viewing performance, or specific durability requirements.
SMD may remain the more rational choice when the project prioritizes broad availability, established maintenance procedures, cost control, or conventional commercial applications.
Factory Perspective: Packaging technology affects initial appearance, production yield, calibration workflow, repair procedures, and replacement consistency throughout the product lifecycle. A buyer should compare the complete maintenance process, not just the initial screen price.
How Much Does an LED Display Cost?
LED display cost depends mainly on pixel pitch, screen size, LED packaging, brightness, cabinet structure, protection requirements, control system, customization, and installation conditions.
There is no reliable single “LED display price per square meter” without defining these variables first.
Main LED Display Cost Drivers
| Cost Driver | Why It Changes Price |
|---|---|
| Smaller Pixel Pitch | More LED components and higher production density |
| Larger Screen | More modules, cabinets and system components |
| Higher Brightness | Higher optical and electrical requirements |
| COB Packaging | More specialized packaging and production |
| Outdoor Protection | More demanding cabinet/module construction |
| Custom Cabinet | Additional engineering and production work |
| Rental Design | Mechanical requirements for repeated assembly |
| Control System | Additional processing and signal hardware |
| Installation | Depends on structure, labor and site conditions |
LED Display Price Per Square Meter
Price per square meter is useful for preliminary budgeting, but it should never be the only procurement metric.
A P2.5 indoor display and a P2.5 outdoor display do not necessarily require the same cabinet, power system, protection level, brightness, or structural design.
Likewise, two P2.5 indoor displays can use different LED packages, driver ICs, cabinet materials, power supplies, calibration systems, and control equipment.
Therefore, a quotation such as “P2.5 = $X/m²” provides insufficient information for a technical purchasing decision.
Hardware Cost vs. Total Project Cost
The screen itself represents only one part of the project.
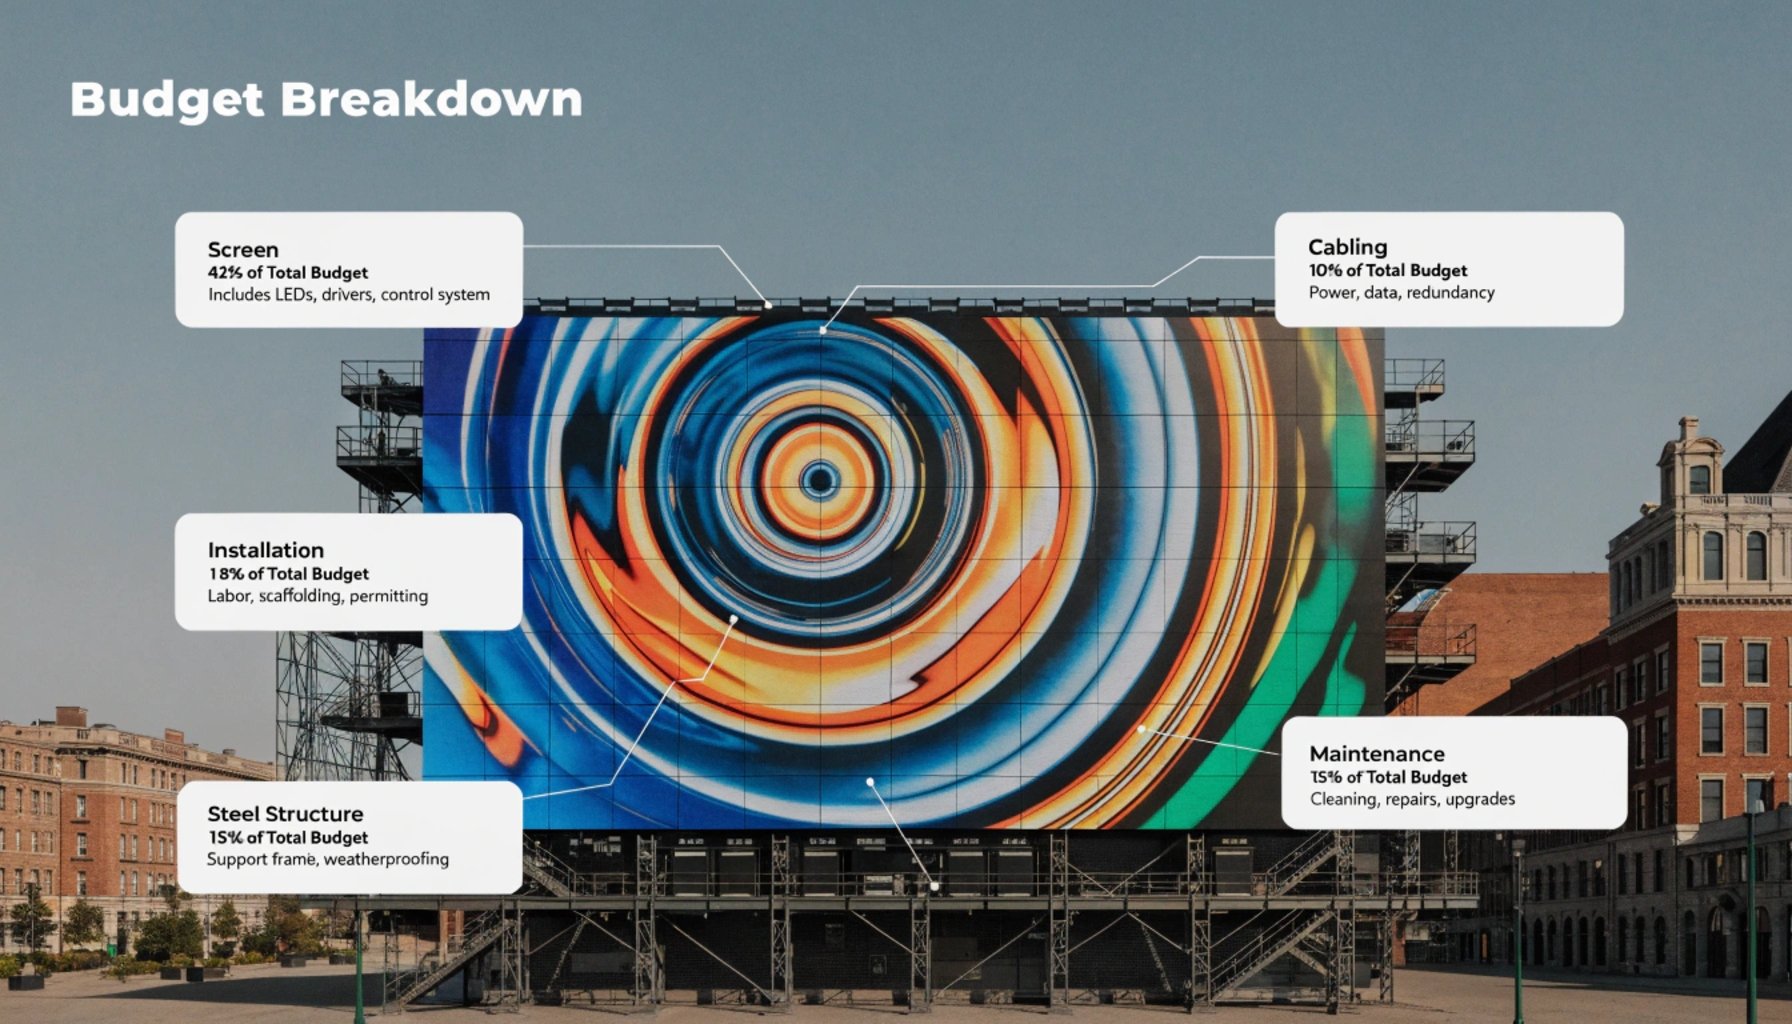
Depending on the application, buyers may also need to budget for:
- Control processors
- Sending and receiving equipment
- Mounting structures
- Power distribution
- Signal cabling
- Transportation
- Installation
- Commissioning
- Spare modules
- Maintenance equipment
- Local electrical work
For a simple indoor wall, installation may be relatively straightforward. A large outdoor screen can require substantially more structural and electrical engineering.
Why Two LED Display Quotes With the Same Pixel Pitch Can Have Different Prices
The same pixel pitch does not mean the same bill of materials.
Imagine two suppliers quote P3.9 outdoor rental displays. One may use a different LED package, driver IC, cabinet alloy, power supply, receiving card, locking mechanism, calibration process, and testing scope.
The price difference may therefore represent a real engineering difference rather than simply a supplier markup.
A professional comparison should ask each supplier to disclose the major configuration items.
Hidden Cost Items Buyers Should Check
Some costs become visible only after the purchase order is signed.
Check whether the quotation includes:
| Item | Buyer Question |
|---|---|
| Control system | Is the processor included? |
| Power system | Are power distribution components included? |
| Structure | Is mounting steel included? |
| Spare parts | How many spare modules are supplied? |
| Calibration | Is factory calibration included? |
| Installation | Who handles commissioning? |
| Warranty | What exactly does the warranty cover? |
| Packaging | Is export packaging included? |
| Replacement | Can future modules match the original batch? |
How to Compare LED Display Quotations Correctly
Use a like-for-like comparison sheet instead of sorting quotations by unit price.
Compare:
- Pixel pitch
- LED package
- Driver IC
- Brightness
- Refresh rate
- Cabinet dimensions and material
- IP protection
- Power supply
- Control system
- Calibration
- Spare parts
- Warranty and after-sales scope
Factory Perspective: When two quotations have the same pixel pitch but different prices, compare the LED package, driver IC, power supply, cabinet material, calibration, spare modules, control system, warranty terms, and testing scope before comparing price per square meter.
Reverse Advice: If a supplier refuses to identify the major component configuration behind the quoted price, treat an unusually low quotation with caution. A low initial price is difficult to evaluate when the bill of materials remains unclear.
How to Choose an LED Display Manufacturer and Supplier
Buyers should evaluate an LED manufacturer by component transparency, production quality control, customization capability, testing procedures, batch consistency, warranty, spare parts, and after-sales support—not price alone.
Supplier Evaluation Checklist
A serious LED supplier should be able to demonstrate:
- Transparent component configuration
- Documented production and QC procedures
- Engineering capability for customization
- Factory testing and aging procedures
- Consistent production between batches
- Clear warranty and spare-parts policies
- Technical support during installation and commissioning
Manufacturer vs. Trading Company
A manufacturer controls or directly manages production processes. A trading company may coordinate production through external factories.
Neither business model automatically guarantees better quality. The key question is how much technical control the supplier actually has over your project.
For customized projects, direct access to engineering and production teams can make communication easier when mechanical, thermal, electrical, or module-level changes become necessary.
What Should Buyers Ask an LED Factory?
Instead of asking only “How many years have you been producing LED displays?”, ask specific operational questions:
- Which LED package does this quotation use?
- Which driver IC is configured?
- What is the maximum and average power consumption?
- How does the factory perform aging tests?
- How is dead-pixel detection performed?
- How is calibration data recorded?
- How are replacement modules matched to previous batches?
- What spare-parts quantity does the factory recommend?
These questions force the supplier to move from marketing language to measurable technical information.
How to Evaluate Factory Production Capability
A factory evaluation should cover more than production capacity.
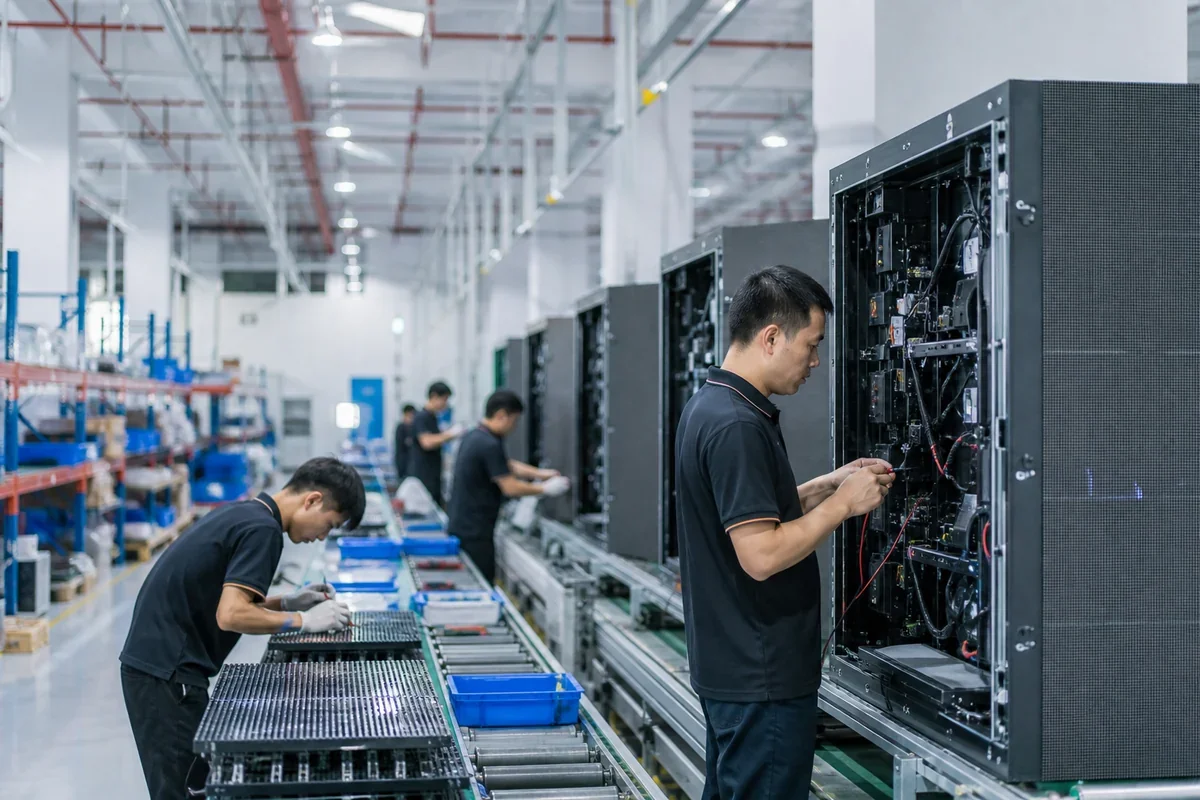
Look for evidence of:
Incoming inspection → SMT/module production → module testing → aging → calibration → cabinet assembly → system testing → final QC
A large production line does not automatically produce a better display. Process control and traceability matter more than factory size alone.
What Quality-Control Processes Should a Manufacturer Have?
A mature production process should identify defects at multiple stages rather than waiting until final inspection.
For example, detecting a soldering or component problem at module level is more efficient than discovering it after cabinet assembly.
The factory should also maintain production records that help engineers trace problems back to specific materials, batches, or production stages.
Why Batch-to-Batch Consistency Matters
Batch consistency becomes critical when a customer expands an existing installation or needs replacement modules years later.
A replacement module may have identical dimensions and the same nominal pixel pitch but still look different if the LED package, driver IC, brightness characteristics, or calibration parameters have changed.
For long-term commercial projects, ask whether the manufacturer maintains relevant production and calibration records.
Factory Perspective: Factory capability becomes most visible during repeat orders and replacement-module production. Maintaining color, mechanical dimensions, brightness, and calibration consistency requires controlled component sourcing and production records.
Certifications, Testing and Export Requirements
A supplier should provide documentation that matches the actual product configuration and destination market. Buyers should distinguish between factory certificates, component certifications, product test reports, and certifications required for the final installation.
For international projects, confirm requirements before production. Depending on the destination and application, these may involve electrical safety, electromagnetic compatibility, environmental requirements, or local installation regulations.
Do not treat a certificate logo on a website as sufficient evidence. Ask for the relevant document and check whether the model or product family matches the quoted configuration.
Warranty and Spare Parts Strategy
A useful LED display warranty should define coverage, duration, response procedures, and responsibilities—not simply state a number of warranty years.
For large projects, spare modules can be particularly valuable. A failed module can often be replaced much faster when compatible spares are already available locally.
Buyers should clarify:
- Warranty duration
- Parts covered
- Labor and service coverage
- Remote technical support
- Replacement procedures
- Availability of replacement components
For long-term installations, also ask how the supplier handles discontinued components.
Factory Perspective: A manufacturer that maintains production records can make future replacement easier because engineers can identify historical component configurations and calibration parameters instead of treating every replacement order as a completely new product.
LED Display Quality Control: What Happens Before Shipment?
Reliable LED displays require multiple quality-control stages, including incoming material inspection, module testing, aging tests, calibration, cabinet inspection, system testing, and final quality control.
LED Display QC Process
Incoming materials → Module production → Module testing → Aging/Burn-in → Calibration → Cabinet assembly → System testing → Final inspection → Shipment
The objective is not to find every possible defect at the last stage. A good QC system detects problems as early as possible so defective components do not continue into later production stages.
Incoming Material Inspection
Factories inspect incoming LED packages, ICs, PCBs, power supplies, connectors, cabinets, and other components according to their internal quality requirements.
This stage matters because component inconsistency can become much more expensive to correct after assembly.
For example, if LED packages from different bins produce visibly different color characteristics, the problem may become apparent only during calibration.
LED Module Production Testing
After module assembly, technicians can check electrical behavior, LED operation, signal transmission, and mechanical condition.
Module-level testing provides an important checkpoint before multiple modules are assembled into complete cabinets.
Driver IC and Power Supply Inspection
Driver ICs influence current control and display behavior, while power supplies determine how electrical power reaches the modules.
A supplier should verify component specifications and compatibility rather than treating every component carrying the same nominal rating as interchangeable.
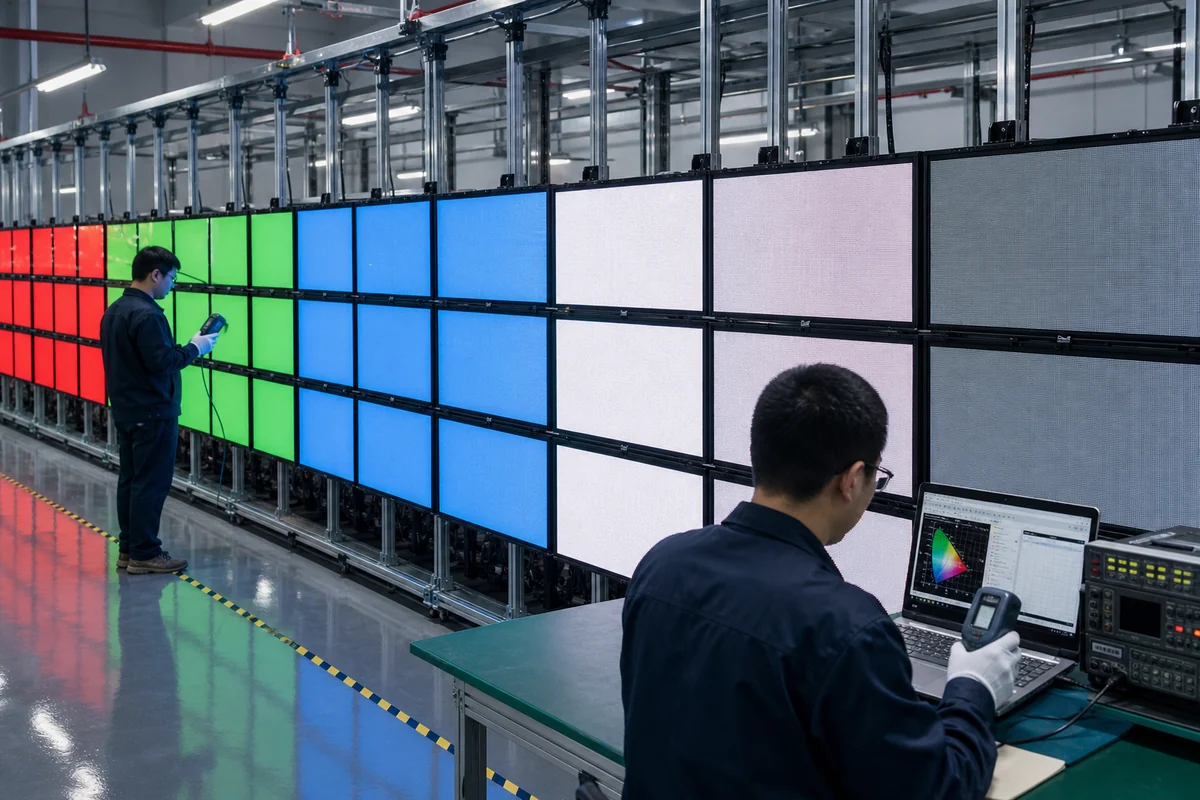
Module Aging and Burn-In Testing
Aging tests operate modules or cabinets for a defined period to identify certain early-stage failures before shipment.
The exact procedure varies by factory and product. Buyers should therefore ask:
- What equipment does the factory use?
- Which components undergo aging?
- How long is the test?
- What defects does the test target?
- How are failures recorded?
Aging is not a guarantee that a display will never fail. It is one part of a broader quality-control process.
Cabinet Assembly Inspection
After modules enter the cabinet, technicians should verify module alignment, cabinet flatness, connectors, power distribution, receiving cards, and mechanical assembly.
For large video walls, cabinet flatness matters because small mechanical differences can become visible across a continuous screen.
Recalibration and Long-Term Color Uniformity
Calibration reduces visible differences in brightness and color between pixels and modules.
The process becomes especially important when hundreds of modules form one display surface.
A factory should also preserve relevant calibration information when the project requires future replacement modules.
Dead Pixel Detection
Dead-pixel control begins before final inspection.
LED package consistency, soldering quality, electrical testing, aging, and final inspection all contribute to the result.
A single final visual inspection cannot compensate for weak process control upstream.
Factory Perspective: Dead-pixel control and color consistency are not determined by one QC inspection. They depend on component consistency, production conditions, aging tests, calibration data, and final inspection throughout manufacturing.
LED Display Installation and System Configuration
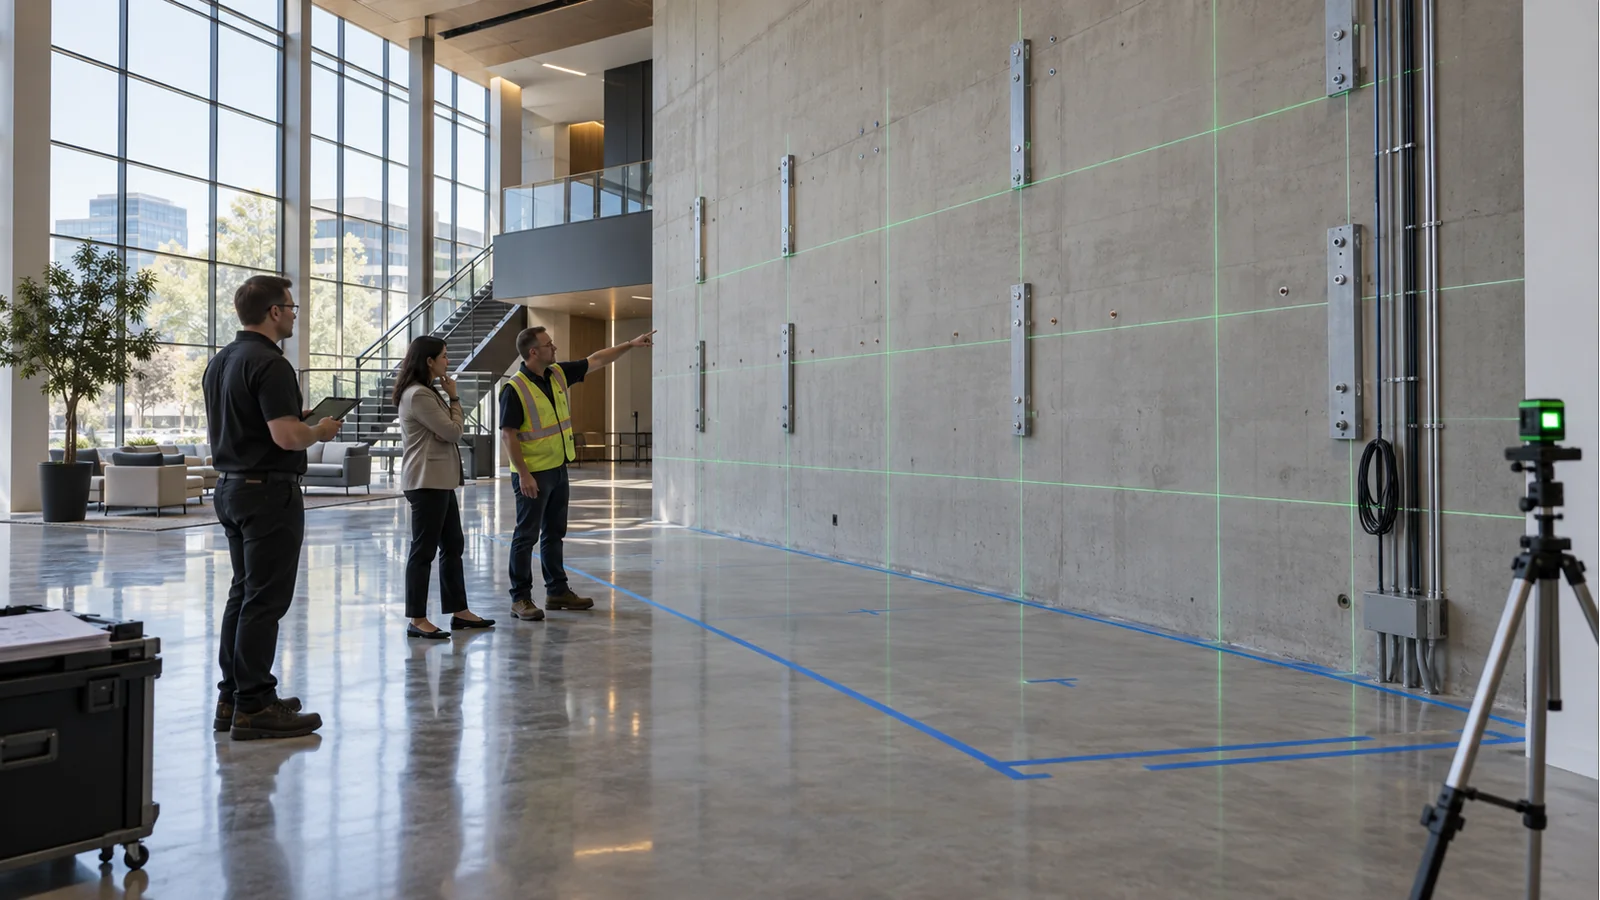
LED display installation requires structural support, power distribution, signal transmission, cabinet alignment, ventilation, grounding, control-system configuration, and commissioning.
Installation Checklist
Before operation, verify:
- Structural support and load capacity
- Power distribution
- Signal and data cabling
- Cabinet alignment
- Ventilation and thermal conditions
- Grounding and electrical safety
- Receiving-card configuration
- Control-system settings
- Full-screen test
- Final commissioning
Structural Requirements
The installation structure must support the screen’s weight and maintain cabinet alignment under real operating conditions.
Large outdoor screens may require dedicated steel structures, while indoor displays can use wall-mounted or freestanding solutions.
The engineering team should verify load distribution, mounting points, maintenance access, and local structural requirements before installation.
Power Distribution
LED displays can consume substantial electrical power, particularly at large scale and high brightness.
Electrical planning should distinguish between the display’s maximum power requirement and expected operating power.
Power distribution should also account for cable sizing, circuit protection, grounding, and local electrical codes.
Signal and Data Cabling
The control system must deliver data reliably across the complete display.
Engineers should plan signal paths before installation, especially for large screens where long cable runs or complex routing may introduce additional considerations.
Keep power and signal cabling organized and clearly identified. This reduces troubleshooting time during commissioning.
Cabinet Alignment and Flatness
Cabinet alignment directly affects the visual continuity of the final screen.
Even when individual modules operate correctly, mechanical misalignment can create visible seams or uneven surfaces.
Installers should therefore check cabinet positioning progressively rather than waiting until the entire screen has been assembled.
Ventilation and Thermal Management
LED components, driver ICs, and power supplies generate heat during operation.
Thermal management therefore affects both performance and component lifespan.
For enclosed installations, engineers should consider ambient temperature, airflow, cabinet ventilation, heat sources, and available maintenance space.
Grounding and Electrical Safety
Grounding and electrical protection should follow the applicable local requirements.
Outdoor installations require particular attention to environmental exposure, electrical protection, and installation conditions.
The product’s ingress-protection rating does not eliminate the need for correct electrical installation.
Receiving Card and Control-System Configuration
The receiving card maps incoming image data to the correct LED modules.
During commissioning, technicians typically configure parameters such as cabinet mapping, resolution, scan mode, module arrangement, and display output.
Incorrect configuration can create symptoms that look like hardware failures even when the physical modules are functioning correctly.
Installation Inspection Before Operation
Before handing over the system, perform a structured inspection:
| Check | Purpose |
|---|---|
| Cabinet alignment | Confirm screen flatness |
| Module connection | Prevent intermittent faults |
| Power distribution | Confirm stable supply |
| Signal mapping | Confirm correct image output |
| Brightness | Verify appropriate operating level |
| Color uniformity | Identify visible module differences |
| Thermal condition | Check abnormal heat |
| Control system | Confirm stable content playback |
Factory Perspective: A properly manufactured LED display can still perform poorly if installation introduces structural stress, inadequate ventilation, unstable power, incorrect signal mapping, or poor cabinet alignment. Manufacturing quality and installation quality must therefore be managed as one system.
LED Display Calibration, Maintenance and Lifespan
LED display lifespan depends on LED package quality, operating temperature, brightness, operating hours, power stability, calibration, and maintenance.
Lifecycle Management
| Lifecycle Factor | Why It Matters |
|---|---|
| LED package | Influences brightness and color stability |
| Temperature | Affects electronic component stress |
| Brightness | Higher output can increase operating load |
| Power stability | Reduces electrical stress |
| Calibration | Maintains visual uniformity |
| Cleaning | Prevents contamination-related issues |
| Spare modules | Reduces downtime |
| Production records | Helps match future replacements |
Why LED Displays Require Calibration
Manufacturing variation means individual LEDs and modules may not produce perfectly identical optical output.
Calibration compensates for these differences so the completed screen appears more uniform.
Calibration can also become part of lifecycle management. If modules are replaced later, technicians may need to integrate the replacement into the existing visual profile.
Brightness and Color Uniformity Over Time
A display does not necessarily age uniformly.
Different components can experience different operating conditions depending on brightness, temperature, duty cycle, and installation environment.
For this reason, a professional maintenance plan should monitor visual uniformity rather than waiting until a viewer notices obvious differences.
Common LED Display Maintenance Tasks
Routine maintenance can include:
- Visual inspection
- Module and connector checks
- Cabinet inspection
- Cleaning
- Power-system inspection
- Thermal inspection
- Signal-system checks
- Dead-pixel monitoring
- Calibration verification
The exact maintenance schedule depends on application and environment.
Dead Pixels and Module Replacement
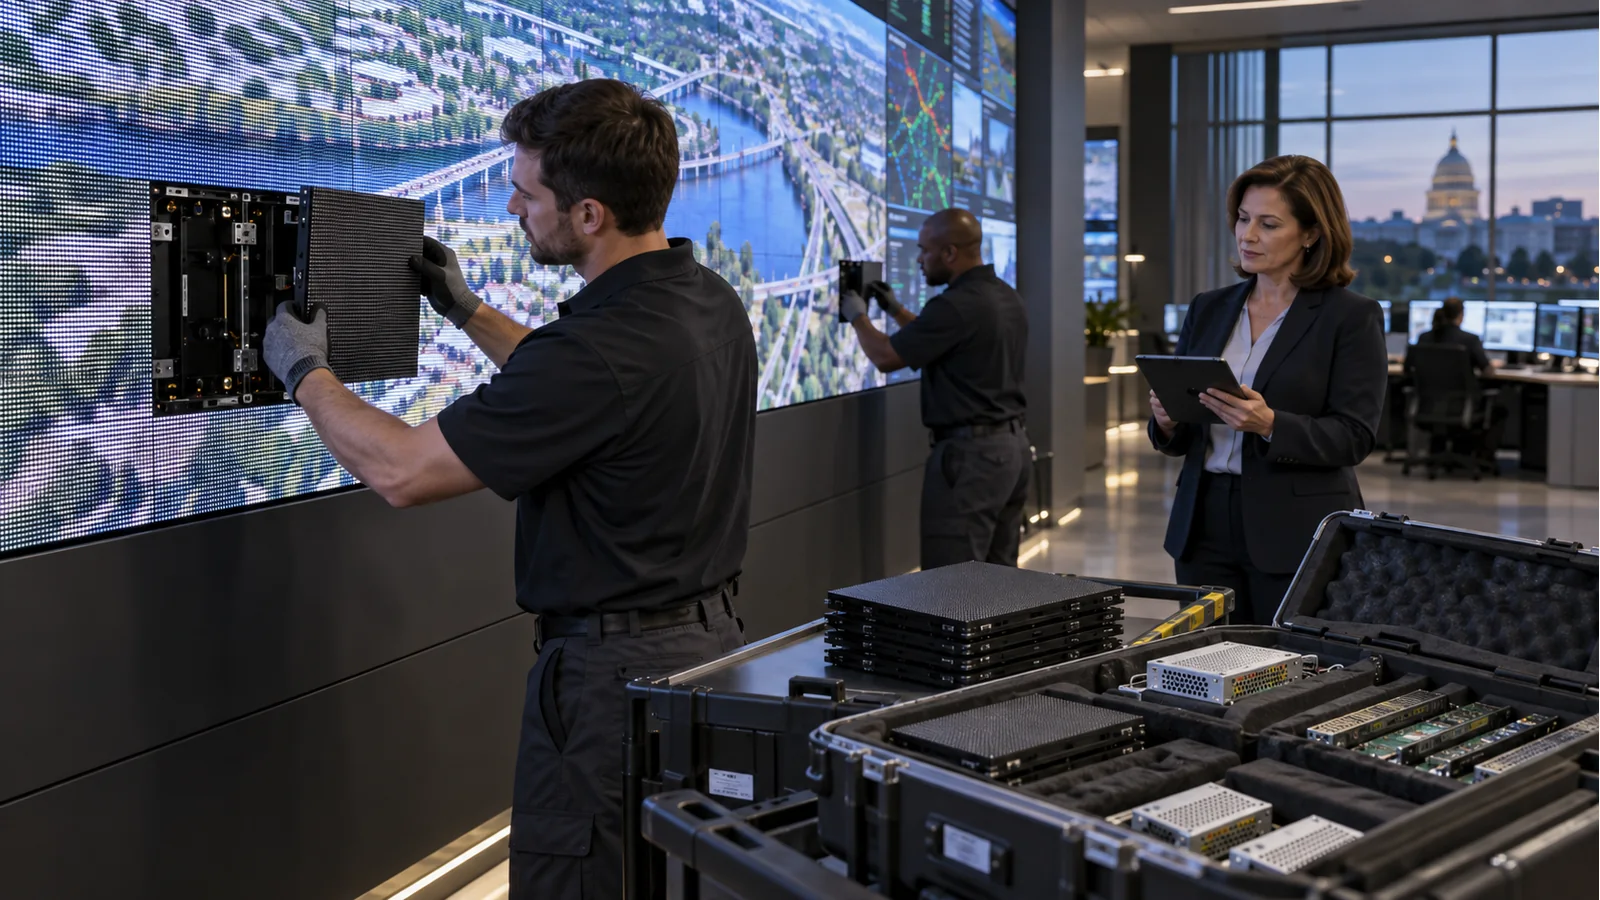
When a module develops a fault, replacement is often faster than repairing individual LED components on-site.
However, replacement creates another technical challenge: the new module must visually match the existing screen.
This is why spare modules should not be treated as an afterthought.
Thermal Management and Component Lifespan
Heat accelerates stress on electronic components.
Poor ventilation can raise operating temperature, while excessive brightness can increase system load.
For enclosed installations, the thermal design should be evaluated before the screen is installed—not after technicians discover abnormal temperatures.
Why Replacement Modules Need Batch Compatibility
A replacement module can fit mechanically and still look different from the original screen.
Differences in LED package characteristics, driver IC configuration, calibration parameters, or production batch can create visible variations in brightness or color.
Factory Perspective: Replacement modules can fit mechanically yet show visible color or brightness differences if the LED package, driver IC, calibration parameters, or production batch differs from the originals. Long-term projects should therefore consider spare inventory and production traceability during the initial purchase.
How to Plan Spare Parts for Long-Term Projects
For mission-critical installations, calculate spare requirements based on screen size, operating hours, environment, service response time, and replacement logistics.
Keep spare modules protected and clearly identified. Record their corresponding model and production information.
Reverse Advice: Do not wait until the first failure to ask whether replacement modules are still available. For large projects, spare-parts planning should be part of the original quotation and contract discussion.
How to Select an LED Display for Different Applications
The best LED display configuration depends on what viewers need to see, how far they stand from the screen, where the screen operates, and how the system will be installed and maintained.
A common purchasing mistake is to start with a preferred pixel pitch or cabinet size and then force that product into the project. A better approach starts with the application and works backward toward the technical configuration.
LED Displays for Retail Stores
Retail LED displays should balance image quality, brightness, viewing distance, content type, and integration with the store environment.
For indoor retail, P1.5–P2.5 can suit many close- to medium-viewing applications, while shopping windows may require higher brightness because ambient daylight and glass reflections reduce perceived contrast.
Retail buyers should also consider:
- Viewing distance from customers
- Window or interior installation
- Content detail
- Screen dimensions
- Brightness control
- Front maintenance
- Heat and ventilation
- Operating hours
Factory Perspective: For retail projects, we recommend checking the actual mounting location before choosing the pitch. A display positioned behind glass may require a different brightness strategy from an interior video wall even when both are classified as “indoor.”
LED Displays for DOOH Advertising
DOOH displays require high visibility, environmental protection, stable operation, and a configuration suited to long viewing distances.
Outdoor advertising screens often operate for long periods and face changing weather and ambient-light conditions.
Buyers should evaluate:
- Required daytime brightness
- Automatic brightness control
- Weather protection
- Cabinet ventilation
- Power consumption
- Remote monitoring
- Viewing distance
- Maintenance access
Do not automatically choose the smallest pixel pitch available. For a roadside billboard viewed from a long distance, a larger pitch may deliver sufficient visual impact while reducing the initial hardware cost.
Reverse Advice: If the audience normally views the screen from far away, spending substantially more for ultra-fine pitch may not create meaningful viewer value.
LED Displays for Corporate and Conference Rooms
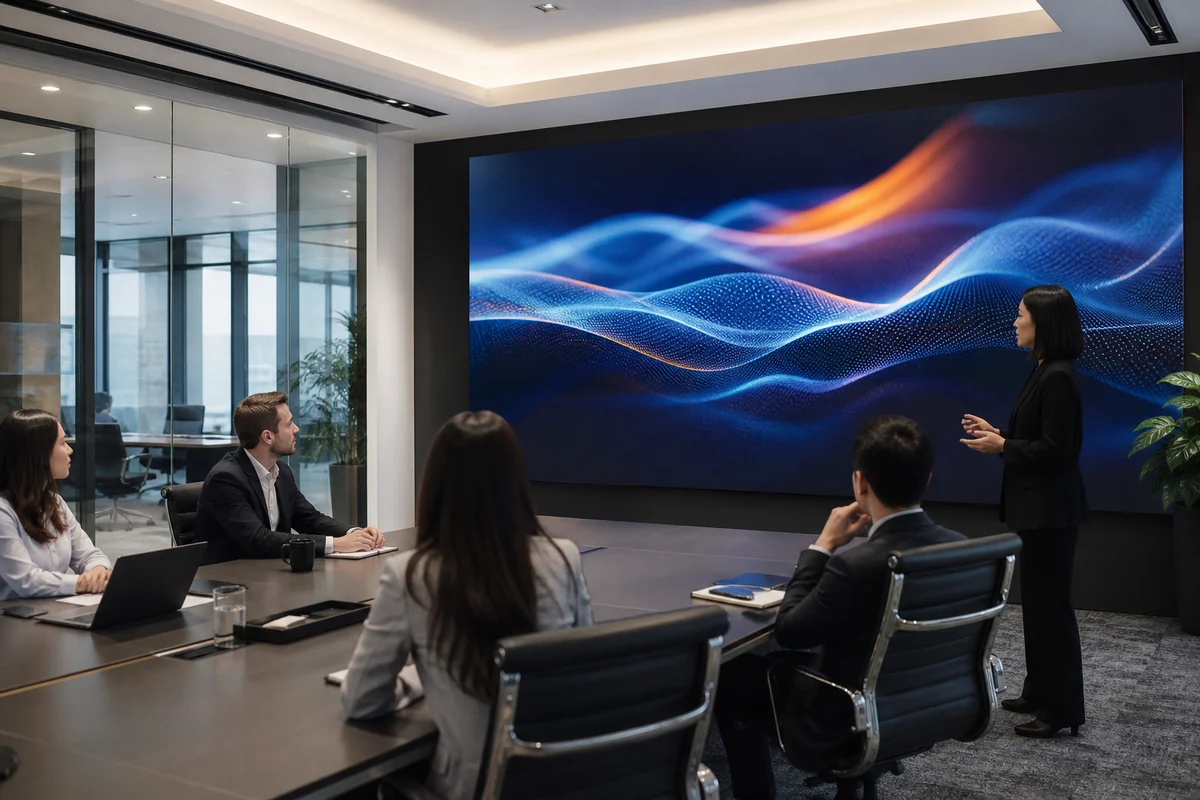
Corporate LED displays prioritize close-viewing image quality, comfortable brightness, resolution, and integration with presentation systems.
Meeting rooms often place viewers relatively close to the screen. Fine-pitch LED can therefore provide a more natural viewing experience than larger-pitch products.
However, the display should also work with laptops, conferencing systems, cameras, and presentation processors.
For corporate environments, consider:
- Pixel pitch
- Screen aspect ratio
- Viewing distance
- Camera compatibility
- Brightness
- Grayscale
- Front service requirements
- Processor compatibility
Factory Perspective: For conference applications, we evaluate the entire signal chain rather than only the LED cabinet. A technically excellent display can still produce a poor meeting experience if the processor, input resolution, or camera workflow does not match the installation.
LED Displays for Stadiums
Stadium LED displays need high brightness, weather protection, viewing-angle performance, structural strength, and reliable operation across large viewing distances.
Different stadium zones require different configurations. Perimeter displays, giant scoreboards, ribbon displays, and spectator-facing screens do not necessarily need the same pixel pitch or cabinet structure.
Stadium buyers should evaluate:
- Long-distance visibility
- Daylight brightness
- Weather protection
- Viewing angle
- Mechanical structure
- Impact protection where applicable
- Maintenance access
- Content and scoring-system integration
For sports environments, refresh performance also matters when cameras capture the display.
LED Displays for Events and Rental
Rental LED displays should prioritize rapid assembly, lightweight construction, mechanical locking, transportation efficiency, and repeated installation.
Rental products experience more physical handling than permanent installations. Cabinet design therefore becomes part of the product’s lifecycle cost.
Buyers should check:
- Cabinet weight
- Locking mechanism
- Corner protection
- Stackability
- Front/rear service
- Transportation dimensions
- Spare parts
- Assembly time
A permanent installation does not necessarily benefit from rental-style engineering. Likewise, a touring event may incur unnecessary labor costs if it uses cabinets designed only for fixed installation.
LED Displays for Museums and Galleries
Museum and gallery LED displays require controlled brightness, accurate visual reproduction, quiet operation, and careful integration with the surrounding exhibition design.
Visitors may stand close to the display, making pixel structure and color uniformity more noticeable.
The display should also avoid overpowering surrounding exhibits.
Important considerations include:
- Fine pixel pitch
- Low and controllable brightness
- Color consistency
- Viewing distance
- Cabinet depth
- Noise and thermal management
- Front maintenance
- Custom dimensions
Factory Perspective: Museum projects often require more attention to low-brightness visual uniformity than outdoor advertising projects. The ability to maintain smooth tonal transitions at lower brightness can become more important than simply specifying maximum brightness.
LED Displays for Broadcast and Virtual Production
Broadcast and virtual-production LED displays require careful control of refresh behavior, scan configuration, color performance, moiré risk, brightness, and camera interaction.
The screen should be tested with the actual camera system whenever possible.
A high refresh-rate specification alone does not guarantee ideal camera performance. Camera shutter speed, frame rate, scan mode, processor settings, and LED architecture interact.
For demanding production environments, buyers should request camera tests before mass production.
LED Displays for Architectural and Transparent Applications
Transparent LED displays are useful when designers need digital content while preserving visibility through glass or architectural surfaces.
The design challenge differs from a conventional flat video wall.
Engineers need to coordinate:
- Transparency requirements
- Viewing direction
- Brightness
- Mounting structure
- Cable routing
- Wind conditions
- Glass/façade structure
- Maintenance access
For creative architectural projects, early engineering validation can prevent expensive modifications after fabrication.
Conclusion
Choosing an LED display requires more than comparing pixel pitch or price per square meter. Buyers should evaluate the complete system, including LED package, driver IC, brightness, refresh rate, cabinet structure, control system, installation conditions, calibration, quality control, and long-term maintenance. Before placing an order, measure the actual viewing distance and screen dimensions, compare component-level quotations, and request clear information about testing, calibration, warranty, and spare parts. These steps help ensure that the selected configuration solves the real project requirements rather than simply offering the highest specifications.
For customized or technically demanding projects, NSELED can help evaluate the display configuration before production, including pixel pitch selection, cabinet design, brightness, protection requirements, maintenance access, and engineering validation. The objective is to build a display system that balances visual performance, installation requirements, lifecycle cost, and long-term serviceability—not simply to maximize specifications or minimize the initial quotation.